|
|
|
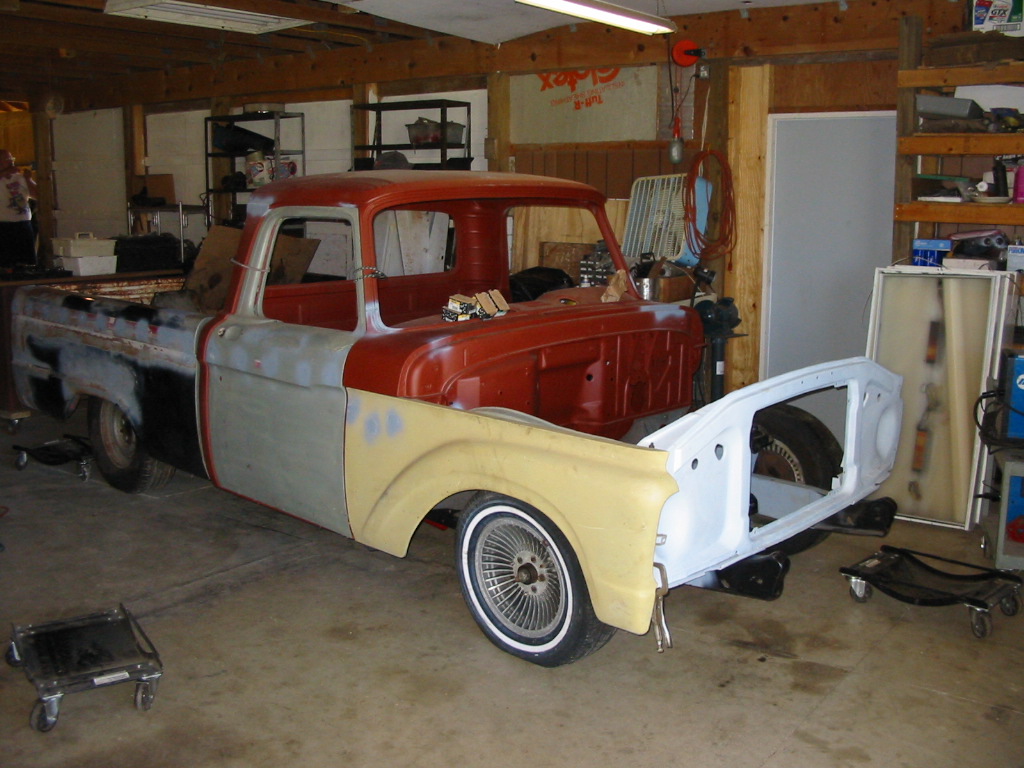
This page is to outline the fabrication and installation of a Mustang II suspension system into my 66 Ford truck.
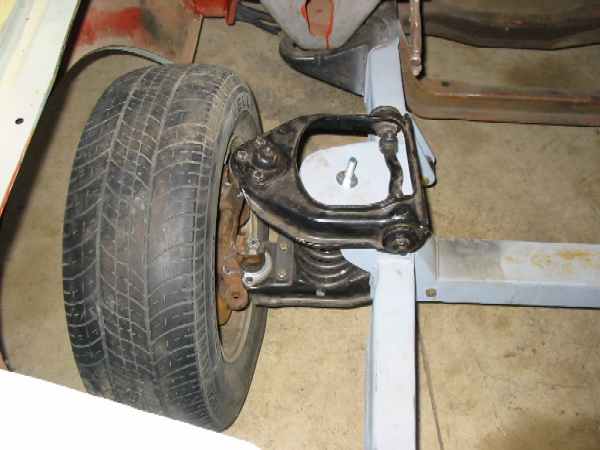
Hot Rodders have used the front suspension off of 74-78 Mustangs and Pintos for many years. This suspension uses two control arms per side, which attach to the spindles, and the frame. I chose to convert to this type of suspension for my truck because I wanted it lower than the stock front "twin I beam" design would have let me go. This type of suspension uses disk brakes. This is a huge improvement in braking force over the original drum brakes. Even with the conversion to disk brakes, the stock mustang brakes are not strong enough. The diameter or the brake rotor is a mere 9", where full size ford and Chevy cars use an approximately 11" rotor. The difference in diameter makes a big difference when trying to stop a truck.
There are many kits out on the market that will let you easily convert your car or truck to the mustang based suspension. There are also many other web sites out there that describe the advantages and disadvantages of each brand. I am not going to go into that here. You can find a lot of information on the manufacturers homepages. Heidts AND Fat Man Fabrications (there are more, these are two useful ones) This is just a very basic description of how I modified my trucks frame to accept this front end.
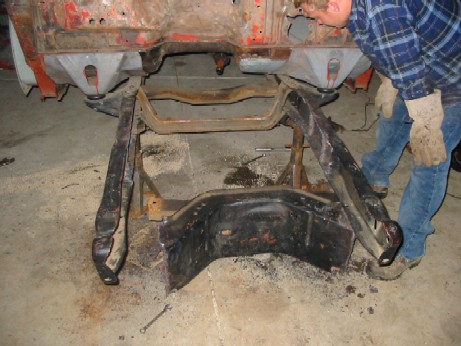
First, you need to strip the truck down to bare frame. The front fenders have got to go, the engine, and everything else that you can unbolt and remove from the frame. This includes all of the original suspension, the steering box, and the shocks.
Next, you need to strip the frame down to the bare rails. I had to cut a bunch of rivets to get the original spring pockets off, and to get the huge main cross member from my frame. Here is a picture of the cross member finally out.
Once you have the frame down to bare rails, now is the time to fill any unnecessary holes that are in your frame. I think I wound up welding over 30 holes in each frame rail. Luckily, when I went down to my local metal/welding fabricator, he had a bunch of scrap "holes" from his punch machine. They fit perfectly into the holes in my frame. All I had to do then, was hold the plugs in place, and buzz them in with the welder. There were lots of holes, they were in the top, bottom and sides of the frame. It took about a day just to get the holes filled.
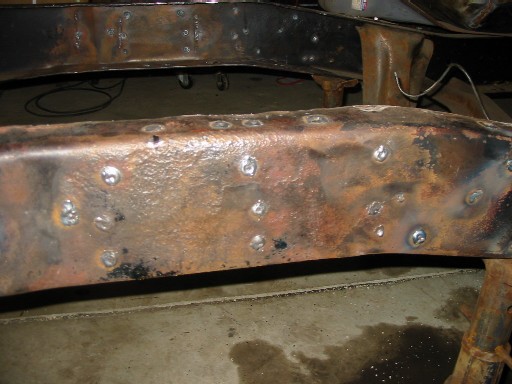
When you do this type of suspension modification, boxing the frame is a requirement. Original frames are shaped like a "C" or a box with one side missing. Welding the final side closed ("boxing") adds lots of strength to the frame, and allows you to weld the cross member to the boxed area. Since my frame was pretty straight in most of the area I needed, I had the metal shop shear some strips for me to use for my boxing plates.
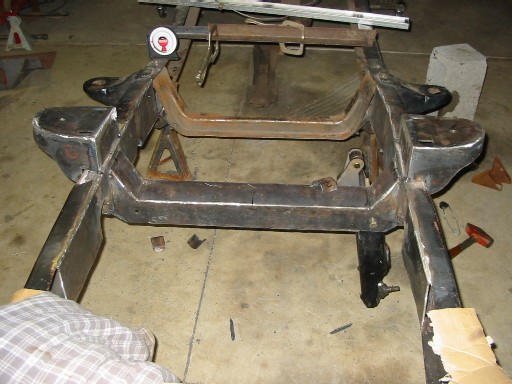
Once I had my frame boxed, I made my cross member. If you purchase your cross member from a company, you can skip this part. In the picture you can see how I made the pieces in cardboard before I cut them out of steel.

Next, you have to position the new cross member into the frame and place some tack welds to hold it in place. It is a good idea to put the tack welds on the corners of the cross member. Next, you have to position the spring pockets. Tack these into place too. Now, double check your triple check that you have everything in place correctly, and weld that sucker in. Make sure you weld every side you can, you don't want this falling out. In The picture below, everything is tack welded in. At this point I have measured everything plenty of times to make sure it is correct.
I used stock mustang control arms, with "strut rod eliminators". These actually serve the same purpose as the strut rods, but do it looking better, and don't bind up at all. I got mine from www.speedwaymotors.com.
A very important part of this installation is the process of welding the cross member and related components in. If you do not trust your welding, or have any doubts, you can have a certified welder complete the installation.
Once I finally had all of the parts to complete the suspension, I assembled it all together. I fabricated a set of "suspension compressors" out of some threaded rod, and some nuts and washers. I placed this where the shocks would go, and only temporary so that i could get an idea of my ride height. Basically I just wanted to see the finished results of my hard work.
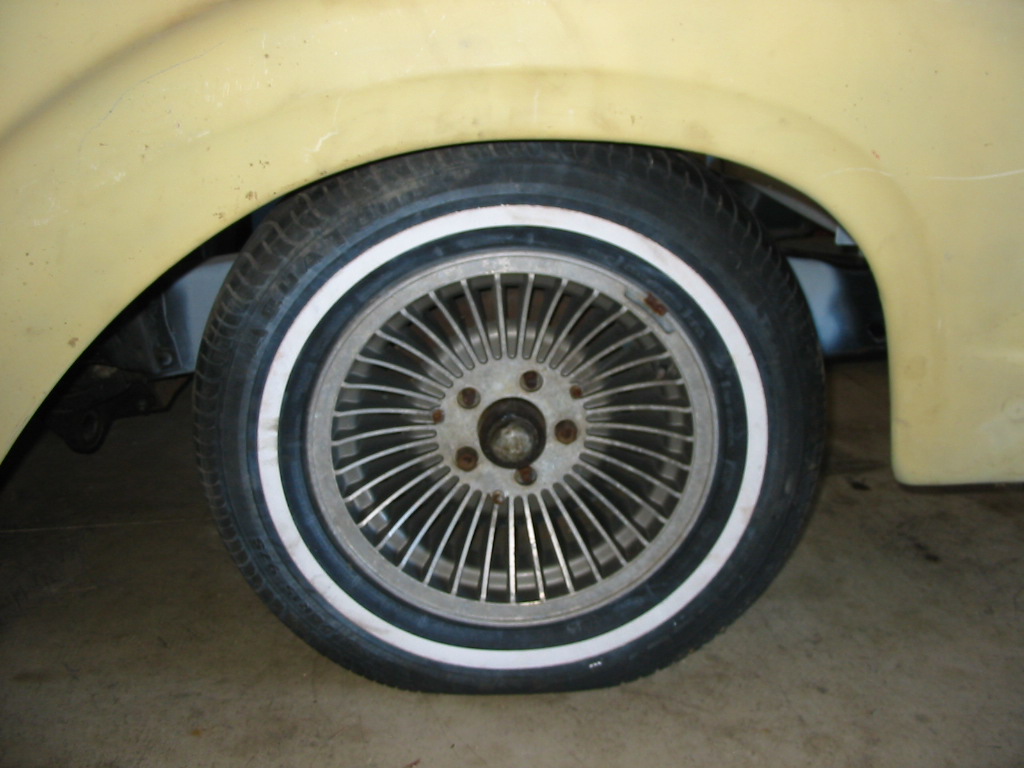
This is a picture of how well the wheel looks in the front fenderwell. When I designed the suspension,
I moved the centerline of the front end one inch towards the front of the truck. The resultant effect is a good tire placement in the fender opening. Im really happy where everything is lining up.
This is a picture of my truck from across the barn. The stance is really close to what I wanted. You can see that I still have plenty of work to do. Hopefully, it will all go quickly, I want to drive this thing sometime soon!